Setting up a local weather server
1/13/20253 min read
To set up an affordable weather server and connect it to the Enviforecasting IoT platform:
IoT devices can either provide raw signals or deliver processed information in a structured format, such as JSON.
The Enviforecasting platform supports two primary methods for receiving and storing data:
Utilizing Google IoT Core to ingest data and leveraging the Google Pub/Sub framework for storage.
Directly receiving IoT device outputs using a combination of Nginx and Flask servers.
The following instructions explain how to purchase, configure, and integrate a low-cost weather station with the Enviforecasting platform.
Deploying a local weather station
Product
The seller “MISOLIE Technology” has several IoT based environmental monitoring products in their store. “MISOL / IP OBSERVER Solar Powered Wireless Internet Remote Monitoring Weather Station” is one of their popular weather stations.
Deployment
Select a suitable location for the deployment with following guidelines
Location should represent regional weather
There should be no obstacles for rainfall within the region of 45 degree from vertical line
There should be no obstacles for wind flow
Firmly fitted to the ground
Vertically mounted the instrument
Direction is align direction with compass direction
Carefully maintain without damage to surrounding and instrument
Assembling the station
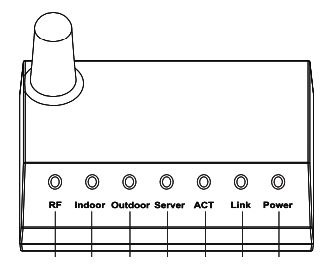
Power-up the receiver
There are two ports at the back of router; one for power and the other to connect to network.
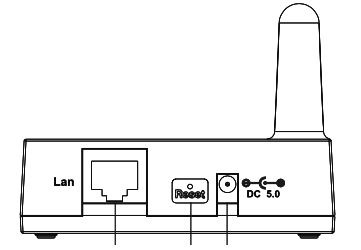

Power supply unit consisting with power code, jack to connect to router and transformed unit to 230v to 5v.
Connect receiver to router with ethernet cable
Ethernet cable used to transfer data received in RF medium to server given network connectivity.
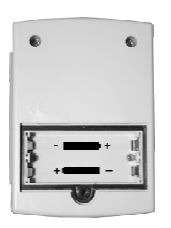
Install batteries in the outdoor sensor and indoor sensor
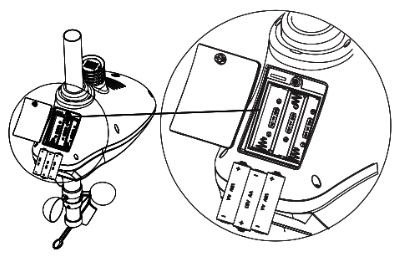
For outdoor sensor used three unit of AA Batries while indoor unit is two unit of AAA batries.
Batries last for years for 24x365 useage.

Make sure the outdoor and indoor sensors are reporting to the receiver
To make sure that data is receiving to router can be shown by light indicating in indoor unit of router, similarly indoor unit also have a blinking light in a router. Light is on indicate those unit are connected, and data is received.

Installation on site
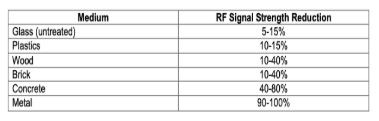
Choose the receiver location and outdoor sensor location within the range of each other
Indore and outdoor unit transmit data in form of RF communication medium. This medium provide 30m range and above restriction to receiver and transmitter it change by maximum distance.

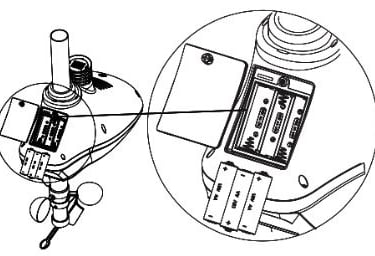
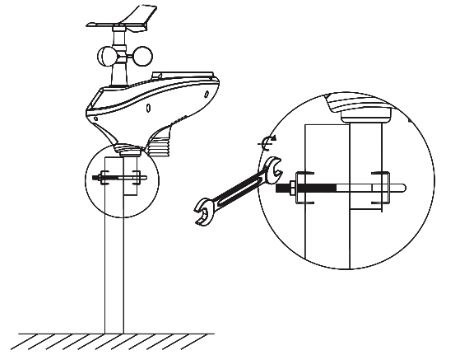
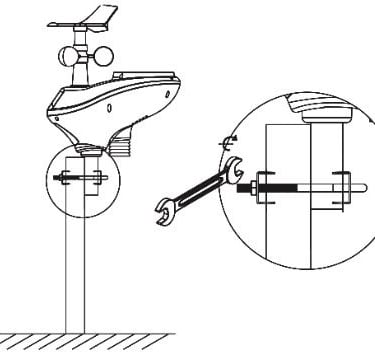
Place the mounting pole for outdoor sensor steadily and vertically
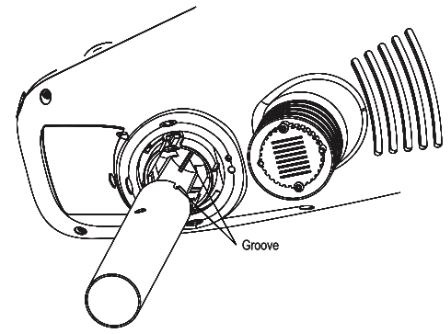
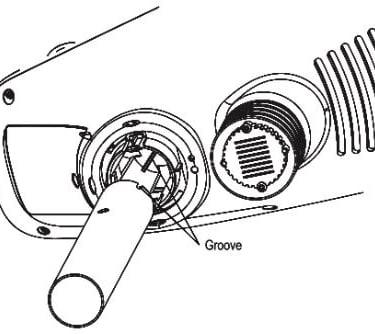
There is rod that connected to mounting purposes for outdoor unit to stay vertical. Unit fixed this rod by connecting mechanism show in above diagram.


Mount the outdoor sensor to mounting pole
Include package with 3ft steel bar to connect outdoor unit and bracket to steel bar connect with pole that support vertical up the outdoor unit
Check the level of outdoor sensor
Use of water bubble placed in outdoor unit keep check vertical adjustments.


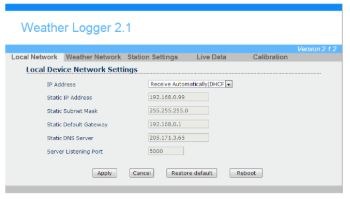
Configure station
It is necessary to find the ip address of the station in the local area network to which the it is connected. This can be done with a tool such as IP tools. Then access the station directly with the identified ip address to see a window similar to the following.

Check live data
go to router menu and go to live data and see the values are updating per 30s interval.

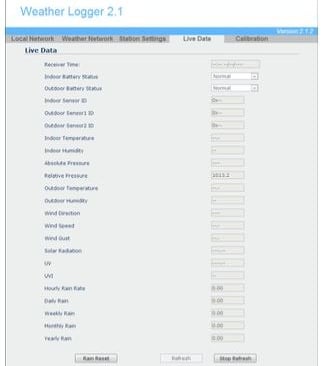
You can now provide enviforecasting's iot server address in the station setting so that your data will be saved in its database and made available through APIs for raw data, tables or graphics.
Collaboration
Uniting for climate research and education initiatives.
Sustainability
Innovation
admin@enviforecasting.com
© 2025. All rights reserved.